MongoDB is emerging as one of the most robust and reliable NoSQL alternatives on the market. Therefore, we have decided to create this post for you to learn how to install MongoDB on Debian 11 without too many problems and get it up and running.
Introduction to MongoDB
MongoDB is a document-oriented NoSQL database manager. It is known for having great performance as it is written in C++ and for being very scalable as well as having an advanced query and indexing model.
The above features make it very versatile in mobile projects where you don’t have a server-side architecture.
Many developers use it as an alternative to traditional relational databases. Especially in projects where there is no need to establish more connections, as in a mobile application.
Let’s get started.
Installing MongoDB on Debian 11 Bullseye
Installing all the dependencies for MongoDB
To start with the tutorial, it is necessary that we have at hand the dependencies covered in the system. So, first update the system.
sudo apt update
sudo apt upgrade
If your user does not have sudo access, then you have to use the root user.
Thereafter, install the required dependencies by running the following command
sudo apt install dirmngr gnupg apt-transport-https software-properties-common ca-certificates curlThese dependencies are required so that we can add external repositories. In this case, the MongoBD one.
Adding the external repository and installing MongoDB on Debian 11
Now we can add the external MongoDB repository to the system. This is the quickest and easiest way to do it, since MongoDB is not included in the official repositories of the system.
First, add the GPG key of the repository to the system.
wget -qO - https://www.mongodb.org/static/pgp/server-5.0.asc | sudo apt-key add -Next, add the MongoDB repository to the system’s list of package sources.
echo "deb http://repo.mongodb.org/apt/debian buster/mongodb-org/5.0 main" | sudo tee /etc/apt/sources.list.d/mongodb-org-5.0.listRefresh all information about the system repositories with the command
sudo apt updateAnd then install MongoDB and its components by running:
sudo apt install mongodb-org
sudo apt install mongodb-org
Reading package lists... Done
Building dependency tree... Done
Reading state information... Done
The following additional packages will be installed:
  mongodb-database-tools mongodb-mongosh mongodb-org-database mongodb-org-database-tools-extra mongodb-org-mongos mongodb-org-server mongodb-org-shell
  mongodb-org-tools
The following NEW packages will be installed:
  mongodb-database-tools mongodb-mongosh mongodb-org mongodb-org-database mongodb-org-database-tools-extra mongodb-org-mongos mongodb-org-server mongodb-org-shell
  mongodb-org-tools
0 upgraded, 9 newly installed, 0 to remove and 21 not upgraded.
Need to get 146 MB of archives.
After this operation, 462 MB of additional disk space will be used.
Do you want to continue? [Y/n]
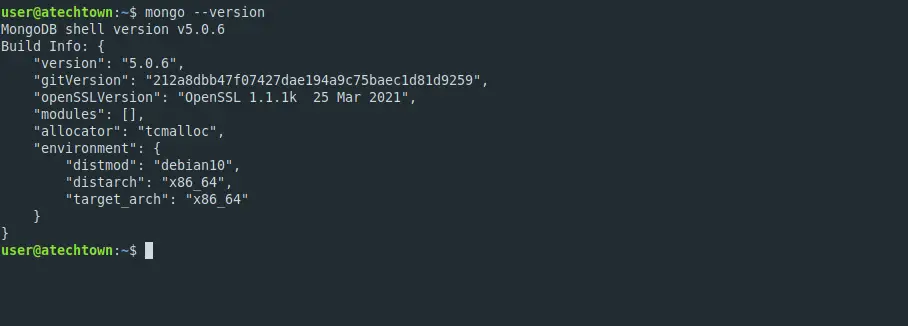
Once installed, you can check the version that has been installed.
mongo --version
Managing MongoDB service
Similar to other programs, MongoDB has a service with which we can restart, start, stop, restart the application. In addition to this, we will be able to consult the status of the service.
Once the installation has finished correctly, you can enable it to start with the system.
sudo systemctl enable mongod
Created symlink /etc/systemd/system/multi-user.target.wants/mongod.service → /lib/systemd/system/mongod.service.
Then, start it.
sudo systemctl start mongodIf you introduce changes to the configuration, you will have to restart the service for the changes to take effect. This can be done in the following way.
sudo systemctl restart mongodIn case you want to avoid using it for a while, the best thing to do is to stop the service using this command
sudo systemctl stop mongodFinally, you can check the status of the service to verify failures or get information about it.
sudo systemctl status mongod
Create a new admin user for MongoDB
This step is recommended to avoid using the admin or root user. So first login to the MongoDB console.
mongoNow switch to the admin database, which is the main database of the application.
use adminThen, run all this I show you.
db.createUser(
   {
     user: "user",
     pwd: "pss",
     roles: [ { role: "userAdminAnyDatabase", db: "admin" } ]
   }
 )
The best thing to do is to copy it, modify it in another directory and finally paste it in the console.
You will see a screen like this

With this user, you can start creating the rest of the databases without compromising the security of the system.
Uninstall MongoDB in Debian 11
If you want to uninstall MongoDB in Debian 11, you have to run
sudo apt remove mongodb-org
And remove the repository
sudo rm /etc/apt/sources.list.d/mongodb-org-5.0.list
Finally, you have to refresh APT.
sudo apt update
Conclusion
In this post, you learned how to install MongoDB in Debian 11. For this, we have used the official repository of the application in our system.
Share our post and help us to grow.