If you are an application developer you are probably already using a text editor or IDE, but if you are a novice you are likely overwhelmed by the sheer number of solutions out there. In any case, it pays to learn about new tools so that you can get the most out of them. Today, you’ll learn how to install juffEd Development Environment on Ubuntu 20.04. In addition to this, we’ll tell you a bit about it.
Introduction—What is juffED?
In a nutshell, juffEd is a powerful and advanced text editor focused primarily for developers. It is a free and open-source project, which means that we can use it with almost no limitations.
The application is easy to learn, the developers themselves say that it is just install and execute. This means that we don’t have to spend time reading documentations or anything like that.
Some of the most important features of the application are:
- Syntax highlighting for more than 20 popular languages.
- Auto-indentation according to file type.
- Code block folding.
- Bracket highlighting with instantaneous jumps between brackets.
- Powerful text search and replace using regular expressions (including multiline) with the possibility to use matches 1, 2, … in substitutions;
But there are also many more, such as the possibility to configure it in your own way from the application options and also including plugins.
Install juffEd Development Environment on Ubuntu 20.04
juffEd is a cross-platform application, which means that we can install it on Linux with little effort. And in the specific case of Ubuntu, this application is present in the official Ubuntu repositories.
So, open a terminal from the main menu or by pressing the keys CTRL + ALT + T and update the system
sudo apt update
sudo apt upgrade
Thereafter, you can install juffEd using the following command line
sudo apt install juffed
Just like that, you can start the installation process on the system. All that’s left is to accept the proposed changes and get started.
Thereafter, you can run it from the main menu.
Using juffEd on Ubuntu
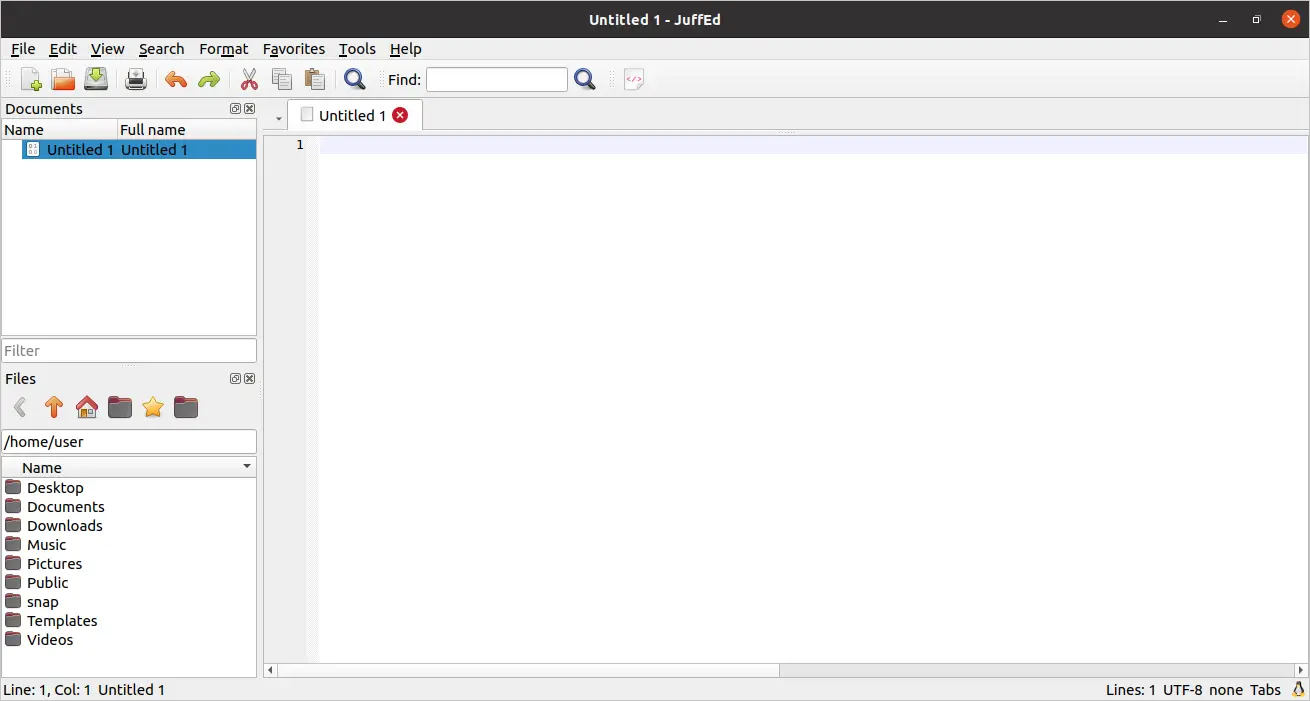
As soon as you run the program from the main menu you will see a screen like this one where the program interface is displayed.

There you will see some panels where you can browse through your project files.
Another thing you can check, is the options window that shows all the settings of the editor.

Uninstalling juffEd from the system
If you don’t plan to use juffEd anymore, the best thing to do is to uninstall it from the system. In this case, we can uninstall the application by running the following command.
sudo apt remove juffedJust like that, you can remove it from the system.
Conclusion
Developers need all kinds of applications to do their work. In some cases, simple applications that allow them to perform a task quickly are enough. One of them is juffEd which is an advanced text editor. Today, you learned how to install it, and could see how easy it is.
I hope you liked this post, and you can share it.