Nowadays there are many music reproduction services where Spotify or Google Music stands out. However, many people still have music files and are exploited in different ways. Whether it is commercial music or not the fact is that these files are still present and it is good to have a modern player. By the end of reading this post, you will be able to install Clementine Music Player on Ubuntu 20.04 perhaps one of the best and most complete.
Clementine Music Player
Clementine Music Player was born as a fork of Amarok 1.4 when it started to become less and less simple. Let’s not fool ourselves Amarok is one of the best but it also started to be heavy and with a not so good interface. So the development team of Clementine decided that they could do something about it and they made Clementine.
Clementine is an audio file player with a QT and open-source interface. But it is also cross-platform what makes it available for Windows, macOS, and even Android.
Some of the main features of Clementine are:
- Search and play your local music library.
- Listen to internet radio from external services like Spotify.
- Search and play songs you’ve uploaded to Box, Dropbox, Google Drive, and OneDrive
- Create smart playlists and dynamic playlists.
- Tabbed playlists, import and export M3U, XSPF, PLS, and ASX.
- CUE sheet support.
- Play audio CDs.
- Visualizations from projectM.
- Lyrics and artist biographies and photos.
- Transcode music into MP3, Ogg Vorbis, Ogg Speex, FLAC or AAC.
And many more…
In no way can we say that Clementine is very complete and very good at what it does.
Install Clementine Music Player on Ubuntu 20.04
Truth be told, Clementine’s development was halted for several years, but they have finally returned with a new version.
In the case of Clementine, we propose 3 different methods to perform the installation. You only have to choose one.
Method 1: Install Clementine Music Player from the official repositories
The first method is very simple to do because Clementine is included in the official Ubuntu 20.04 repositories so everything is easy.
To install it, it is necessary to open a terminal from the main menu or pressing the keys CTRL + ALT + T and then execute:
sudo apt update
sudo apt install clementine
And then run it from the main menu.
Method 2: Using the snap package
Clementine is also distributed as a Snap package, so we can also use this technology.
To do this, in a terminal, run:
sudo snap install clementine
Again, when the installation is finished you can run it from the main menu.
Method 3: Install Clementine using the Ubuntu Software Center
But if you are not very friendly to use the terminal or you are not familiar with it, it is also possible, to install Clementine from Ubuntu Software Center-
So, open it from the main menu, and in the search field type Clementine to start the search.
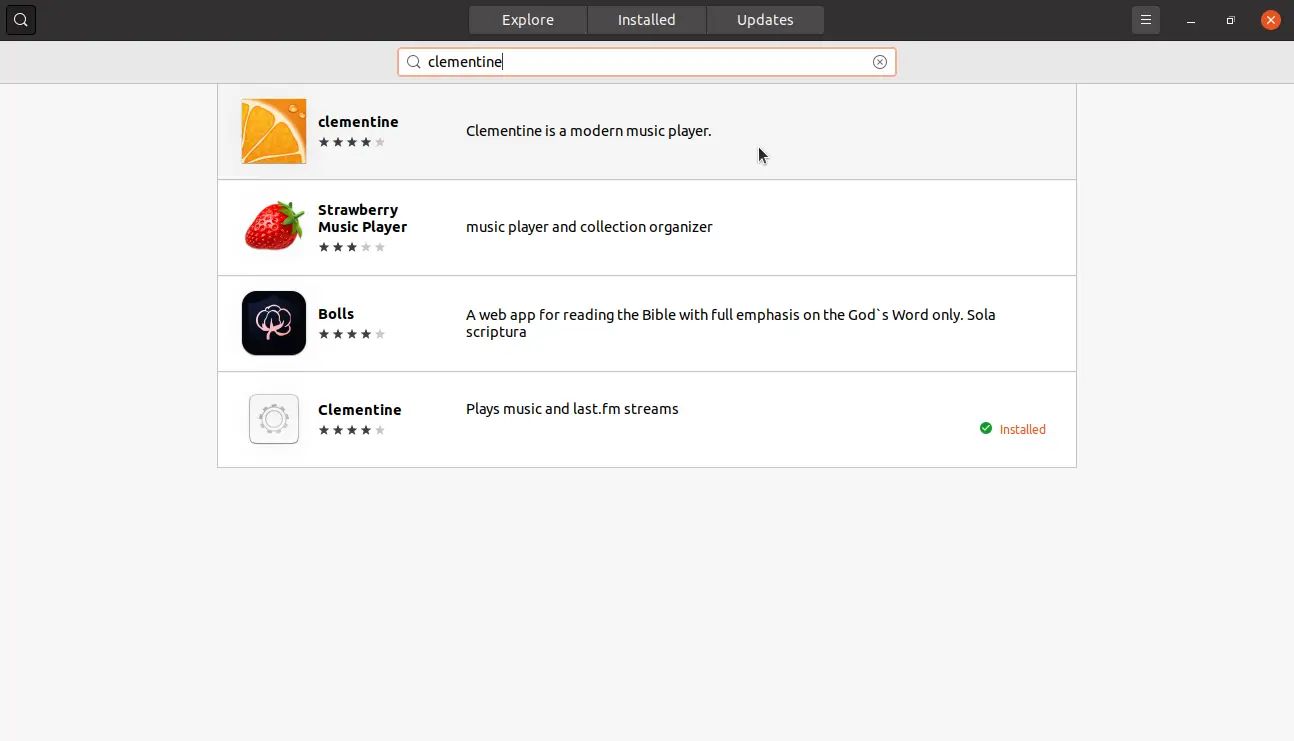
When you find it, you can click on the result (first result), to show its details.
Then, click on the install button to start the process.
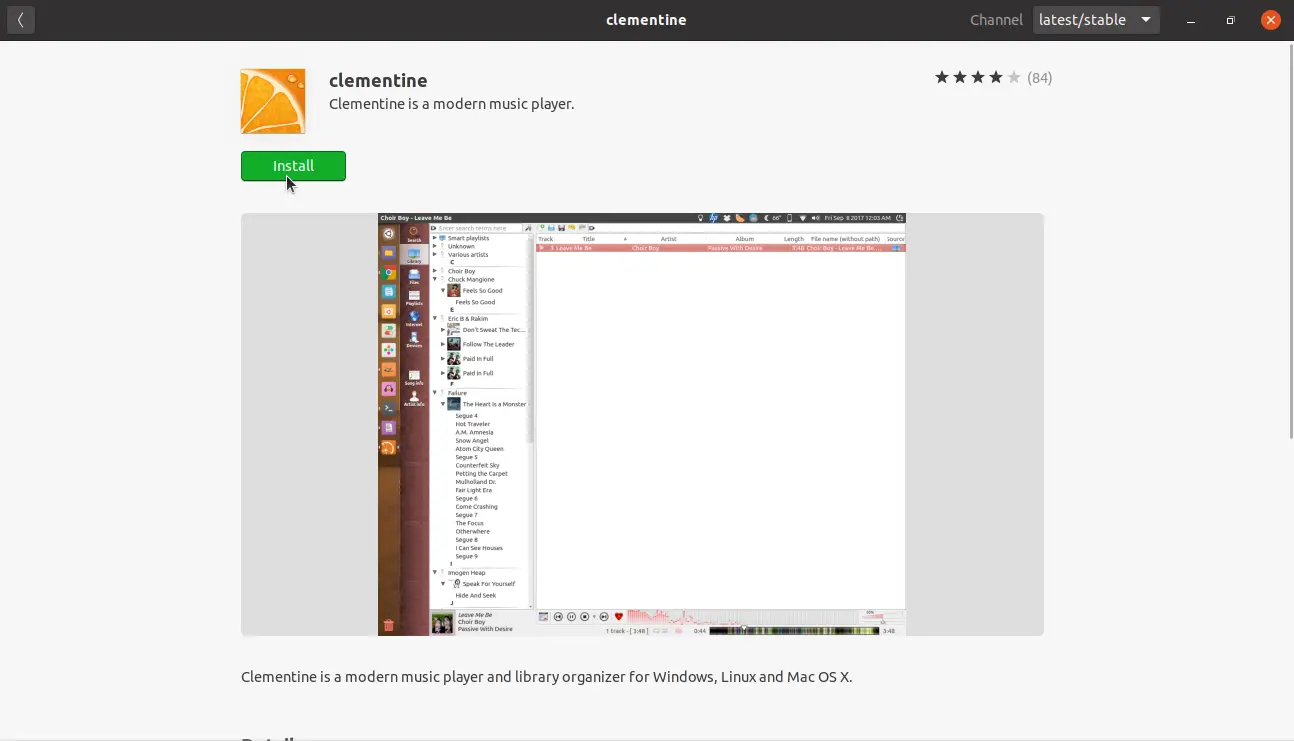
In the end, go to the main menu and run it from there.
Running Clementine Music Player
Once you have opened Clementine, you will see the graphic interface of the application
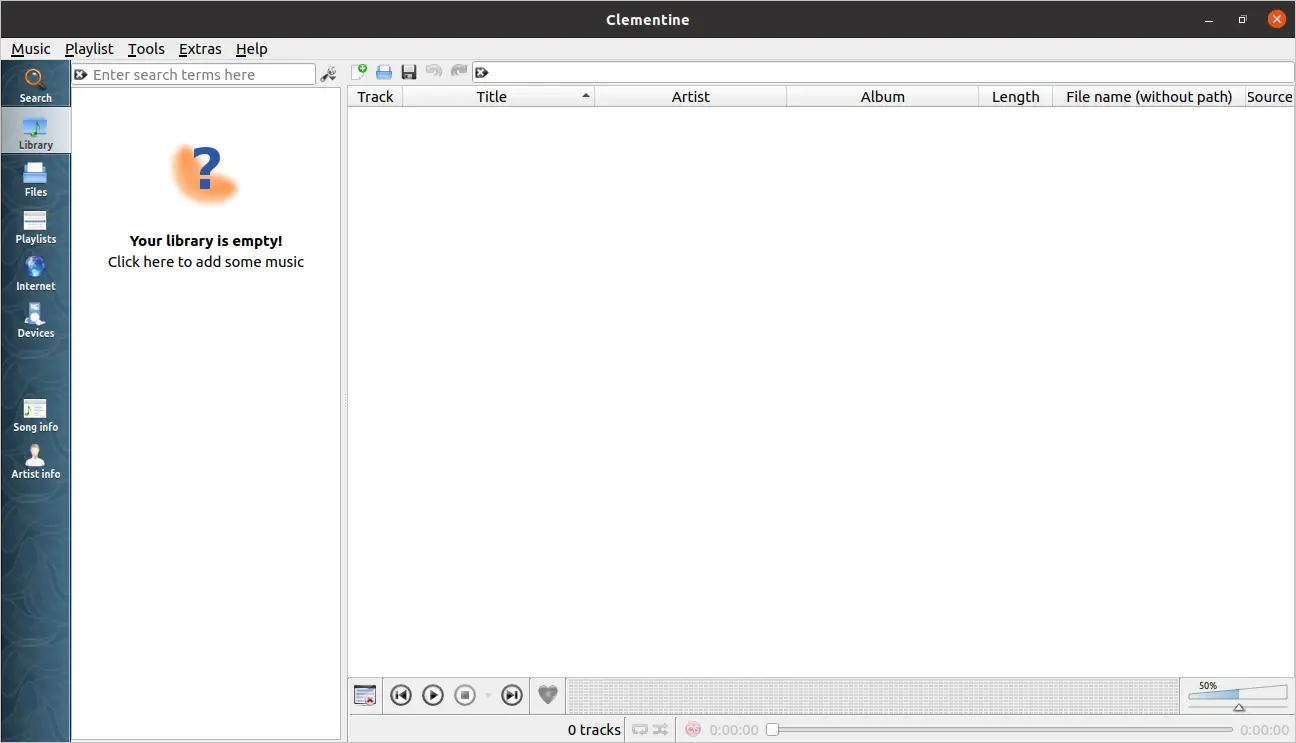
.
On the left side, you will see that our music library is empty and you can add your own by clicking on the button.
Clicking on it takes us to the Clementine settings and specifically to the music library section. In this case, what we have to do is indicate in which folder our files are. To do this, click on Add New Folder and select yours
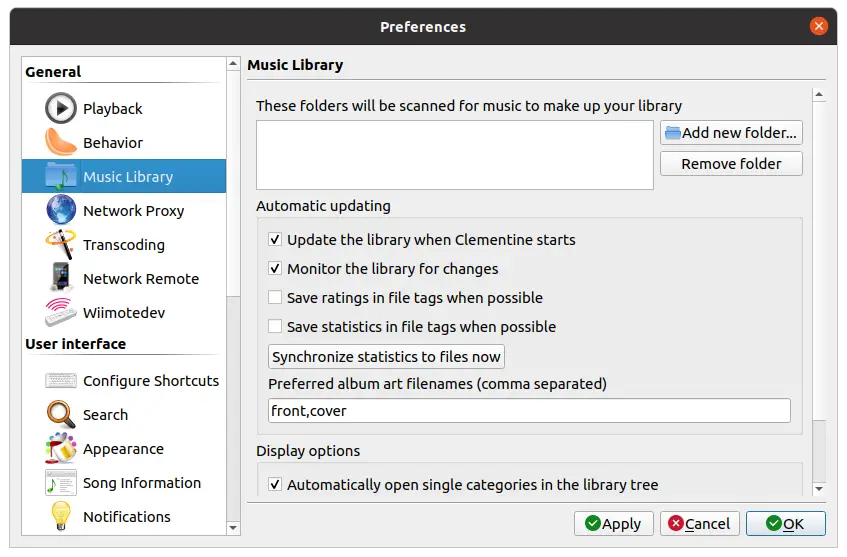
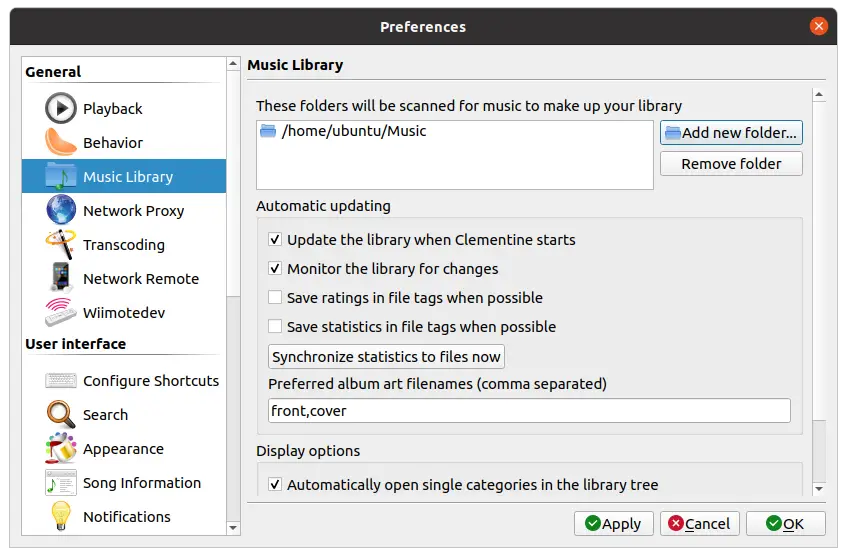
Then, click on the Apply button and then on Ok to start loading.
Then you can enjoy Clementine without any problem.
Conclusion
Clementine is a veteran application in Linux, but it has not stopped being quite useful. Even in the era where on-demand music services rule the market, there is always room for these applications. Especially when many people still have their music on the computer.
Let us know about you, have you used Clementine? Do you like it? Do you know it? Leave a comment and share this post. This helps us.
Thanks for reading.